Browsing "Older Posts"

Browsing Category "Universal Theme"

Set APEX application name for Dev, Test and Prod environment in the same database

Von Tobias Arnhold → 7.18.2018
In case you have a small application where development, test and maybe also production environment are on the same database and your applications in this environment distinguish only by the application IDs. To setup a custom application name based on the ID you could do like this:


We assume our application name is "Training room app" defined in the "Shared Components" > "User Interface Attributes"


To differentiate the environments I add a dynamic action "Page Load" on Page 0.
This dynamic action is executing custom Javascript code:

if ('&APP_ID.' == '200') {
  $('.t-Header-logo').find('span').html('Training room app - <b style="color:#008A34">Test Environment</b>');
}
else if ('&APP_ID.' == '300') {
  $('.t-Header-logo').find('span').html('Training room app - <b style="color:#9366a5">Development Environment</b>');
}


The code is changing the name of the logo area.


The best Oracle technology week ever - Part 1: Helsinki and Stockholm

Von Tobias Arnhold → 9.07.2017
You remember my last blogpost describing how my #europeTour would be like:
#orclapex Europe tour 

It was a week with as little sleep as possible. Reasons:
 - traveling
 - just was to excited
 - to much party

It all started in Helsinki with the first Oracle APEX day in Finland.
I reached Helsinki with Richard Rieb around 10 o'clock in the evening. It was dark and cold, our taxi driver spoke 5 words to us but good hard rock music was played on the radio. We knew we have come to the right place.
At the next day we met the organizers (Heli and Marko), the other speakers (Carsten Czarski, Shakeeb Rahman, Matthias Nöll and Mathias Magnussen) and 30 other APEX interested people.
I was happily surprised to meet Matt Nolan from the FOEX crew.
Background story: This guy gave me, in hard times maybe 8 years ago, some good tips and kept my APEX passion alive.
I was even more surprised to meet Jari Lainen which created a really nice APEX example application and has an awesome blog as well. He mentioned to join a new APEX project soon. He will hopefully start writing then again.

The presentations were really good but see for yourselves:


Btw: If you think I do crazy stuff then I always find someone even more devoted like Heli who flew to Soul for the Oracle code conference in between the Finnish APEX event and the POUG in Krakow.

We the other presenters, except Mathias who had to fill the time gaps in between the conferences, took the cruiser ship to Stockholm.


Funny fact: beer at the bar was 6 €, one beer at the tax free shop costs 3,50 € and 24 for of them in a pack costs 20 €. You know what we did.

We enjoyed beers in a stormy night at the railing watching the ocean.
Tip: On a shaky boat just drink 5 beers and feels like you have drunken 10.

In Stockholm we got the perfect location including really tasty food during the first Oracle APEX day in Sweden. 60 participants were listening to our presentation. See for yourselves:


We got great feedback by the customers and enjoyed several nice talks. I even talked to a guy from Denmark who just came to participate at this particular conference. Thanks to the Swedish Oracle Usergroup (SWEOUG) making it possible. My special thanks goes to Daniel and Mathias.

We spent the night by my relatives as Richard discoverd that one of the beers got broken and drenched his backpack. :D Luckily he flew home the day after.

Next Morning at 5 o'clock we (Matthias and me) headed towards the Arlanda airport and took the flight to Berlin.
In Berlin we met the students for the "NextGEN goes POUG trip" (#pougtrip)

In case you want to look at all the tweets from the conference then search for #europeTour, #sweougApex17 or #orclapex.

Next time I will tell you all about the trip to the "POUG 2017". :) Look closely at the DOAG website.

An introduction into the APEX 5.1 Layout View

Von Tobias Arnhold → 4.04.2017
Many of you are still using the old "Component View" but the "Page Designer" introduced in APEX 5 made the developer life much easier.

The top 5 most time saving abilities for me are:
 1. Easy access on all page elements (without any page refresh)
 2. Copy&Paste of items, regions, dynamic actions, ... 
 3. Drag&Drop moving of items and regions
 4. Multi edit of items
 5. Since APEX 5.1: The ability to customize your own personal Page Designer View

The functionality "Layout" introduced in APEX 5 was not in my focus and as I remember I had some issues with it. So I just ignored it.

In APEX 5.1 I started a rerun on it using the "Universal Theme" and I must say it is a real help when you create a complex form page with a lot of page items. It feels different in APEX 5.1 and works almost flawless.

To get in touch with it I prepared a little example for you to help understanding the feature and may get inspired to use it, too.
We start with a page including 16 page items which should be visualized on 3 rows. Some of them are conditional and they are from different types (Text Field, Radio Group, Select List, Textarea).

All items are now displayed one below the other.


What do I aim for in the first step?
1. All items should have the label set to be "above". (Do not use the region template option for that)
2. I want to edit 8 page items split on two rows
3. Items 1-3 per row should be displayed over 2 columns
4. Item size must be adjusted


In between I made a Dynamic Action to make the "detail group" item conditional based on "Organization" if it is null or not.

I did the same for the category selector but I needed some Javascript code to make it right.


Code:
apex.item( "P9_CAT1_NAME_A" ).hide();
apex.item( "P9_CAT1_NAME_B" ).hide();
apex.item( "P9_CAT2_NAME" ).hide();
apex.item( "P9_CAT3_NAME" ).hide();
apex.item( "P9_CAT4_NAME_V1" ).hide(); 
apex.item( "P9_CAT4_NAME_V2" ).hide(); 
apex.item( "P9_CAT4_NAME_V3" ).hide();    

if ( $v("P9_CATEGORY_SELECTOR") == '1' ) {
    apex.item( "P9_CAT1_NAME_A" ).show();
    apex.item( "P9_CAT1_NAME_B" ).show();     
}
if ( $v("P9_CATEGORY_SELECTOR") == '2' ) {
    apex.item( "P9_CAT2_NAME" ).show();  
}

if ( $v("P9_CATEGORY_SELECTOR") == '3' ) {
    apex.item( "P9_CAT3_NAME" ).show();  
}
if ( $v("P9_CATEGORY_SELECTOR") == '4' ) {
    apex.item( "P9_CAT4_NAME_V1" ).show();
    apex.item( "P9_CAT4_NAME_V2" ).show();   
    apex.item( "P9_CAT4_NAME_V3" ).show();       
}

In my final move I finished the page by adjusting the other items.


The page looked like that:


But as always it could be a little bit better and luckily I used APEX. I just had to make a little change on it:

That's it. Hope you will give the "Layout"-View a chance to proof itself. :)


Info:
In case your Page Designer mentions problems in applying some multi update settings. Just refresh the page and try again.

Using APEX_ERROR to manage custom error messages

Von Tobias Arnhold → 1.18.2017
Sometimes you just feel like you would be a newbie in coding business applications. Luckily it doesn't happen so often anymore. But this time it hit me hard. :)

During an application upgrade on Universal Theme I discovered an ugly workaround to create custom error messages I used in that time.

The old code looked like that:
declare 
  retval number;
  p_cust_id number;
  p_status varchar2(30);
  p_upduser varchar2(10);

begin 
  p_cust_id := :p1_cust_id;
  p_status  := 0;
  p_upduser := :app_user;

  retval := cust_apex_pkg.cust_apex_fnc ( p_cust_id, p_status, p_upduser );

  if retval = 1 then
    apex_application.g_print_success_message := '<span style="color: green;">Order was successfully published.</span>';
  elsif retval = 2 then
    apex_application.g_print_success_message := '<span style="color: red;">Error: Custom error 1 occurred.</span>';  
  elsif retval = 3 then
    apex_application.g_print_success_message := '<span style="color: red;">Error: Custom error 2 occurred.</span>';  
  else
    apex_application.g_print_success_message := '<span style="color: red;">Error: Unknown error occurred.</span>';  
  end if;
  commit; 
end;
As you can see I used the apex_application.g_print_success_message to overwrite the text color. Quite ugly but it worked as expected.
Anyway on Universal Theme it looked not so nice anymore because a "success message" has always a green background color. Putting some red text color above is not the user experience I would prefer.


I searched for about 3 minutes and found a really good article from Jorge Rimblas writing about the APEX_ERROR package. The blog post is from 2013 so this procedure must be available for a while now. What made me feeling like a jerk. The good side is that I now can start again to climb up on the iron throne. :)

The updated code looked like that:

declare 
  retval number;
  p_cust_id number;
  p_status varchar2(30);
  p_upduser varchar2(10);

begin 
  p_cust_id := :p1_cust_id;
  p_status  := 0;
  p_upduser := :app_user;

  retval := cust_apex_pkg.cust_apex_fnc ( p_cust_id, p_status, p_upduser );

  if retval = 1 then
    apex_application.g_print_success_message := 'Order was successfully published.';
  elsif retval = 2 then
    apex_error.add_error(
      p_message => 'Error: Custom error 1 occurred.'
    , p_display_location => apex_error.c_inline_in_notification
    );
  elsif retval = 3 then
    apex_error.add_error(
      p_message => 'Error: Custom error 2 occurred.'
    , p_display_location => apex_error.c_inline_in_notification
    );
  else
    apex_error.add_error(
      p_message => 'Error: Unknown error occurred.'
    , p_display_location => apex_error.c_inline_in_notification
    );
  end if;

  commit; 
end;

Thanks Jorges by blogging and sharing your knowledge.

SVG in APEX: Best Practices

Von Tobias Arnhold → 12.21.2016
In the last 8 month I was working on a new version of my SVG (Raphaël) example application. Of course I have a job (freelancer) and I have children. So the time to spend was diminished on only a few hours per week mostly on my way to work.
Some of the results were presented at the Swedish Oracle meetup in Summer '16. But the final application was made for DOAG 2016.

What leads me to an important point. To have the honor to present somewhere means for me also a passion to learn something new, create something new and share it with others to become a better developer. You may think 8 month of free time spend for a simple presentation is stupid but now I'm able to propose new business solutions to my customers which I didn't even thought were so easy to achieve.

And this is not all. One month before DOAG I was talking to a colleague "Sebastian Reinig" from another consulting company (Syntegris). A young men still studying for master grade and with a lot of passion towards Oracle APEX. He explained me that he worked on an APEX project using my former SVG solution from back in '14 and he enhanced my code by adding cool new features. (e.g. drag and drop in the harbor).
I mean those features were fitting perfectly in my example application. So I asked him to join my presentation at DOAG and show others what he was doing. An he did it. He added a new variant of my old example and helped me finishing the application.

That is why we should be presenting somewhere:
To become better by doing something new.
To become better by sharing your ideas with others and even get inspired by their ideas.

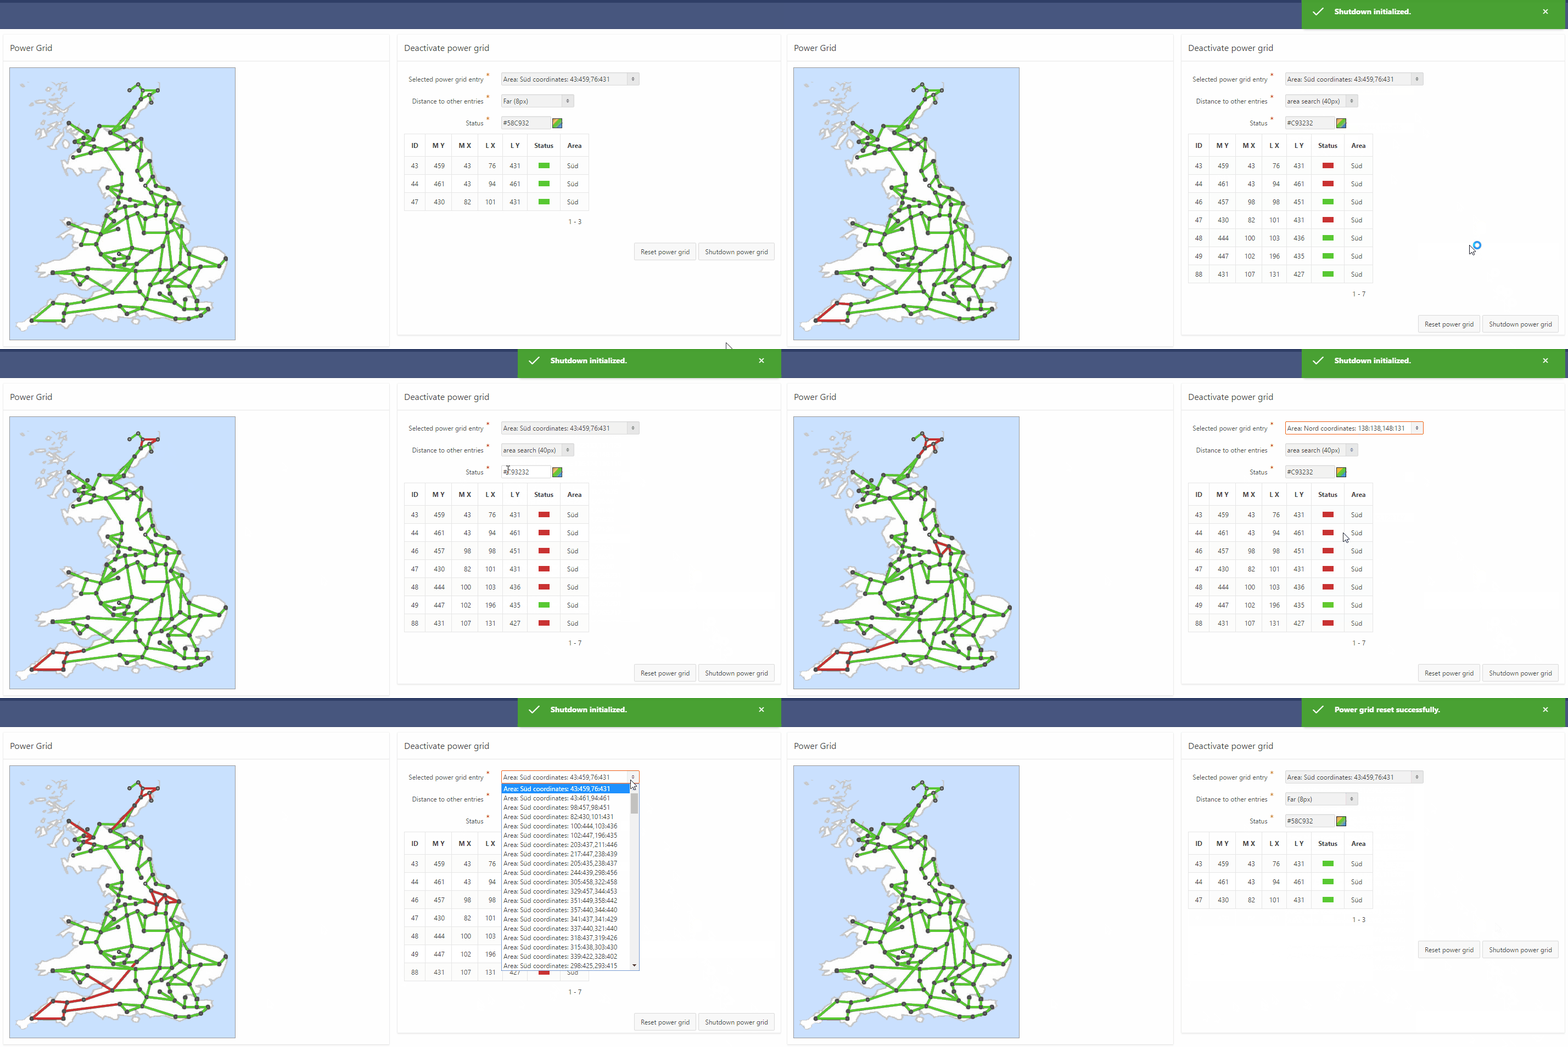
The result of this passion is the "SVG in APEX" application.


Download: github.com/tobiasarnhold/svg-in-apex
Example application URL: apex.oracle.com/pls/apex/f?p=SVG_IN_APEX
User: demo
Password: demo

Examples:

 1. Power grid (Great Britain including their main electricity pipelines)


2. Image tag editor


3. Harbor - Edit mask


4. Harbor - Drag and Drop


5. Mapael - Country visualization with edit mask


6. Mapael - Country visualization with canvas spark-line charts


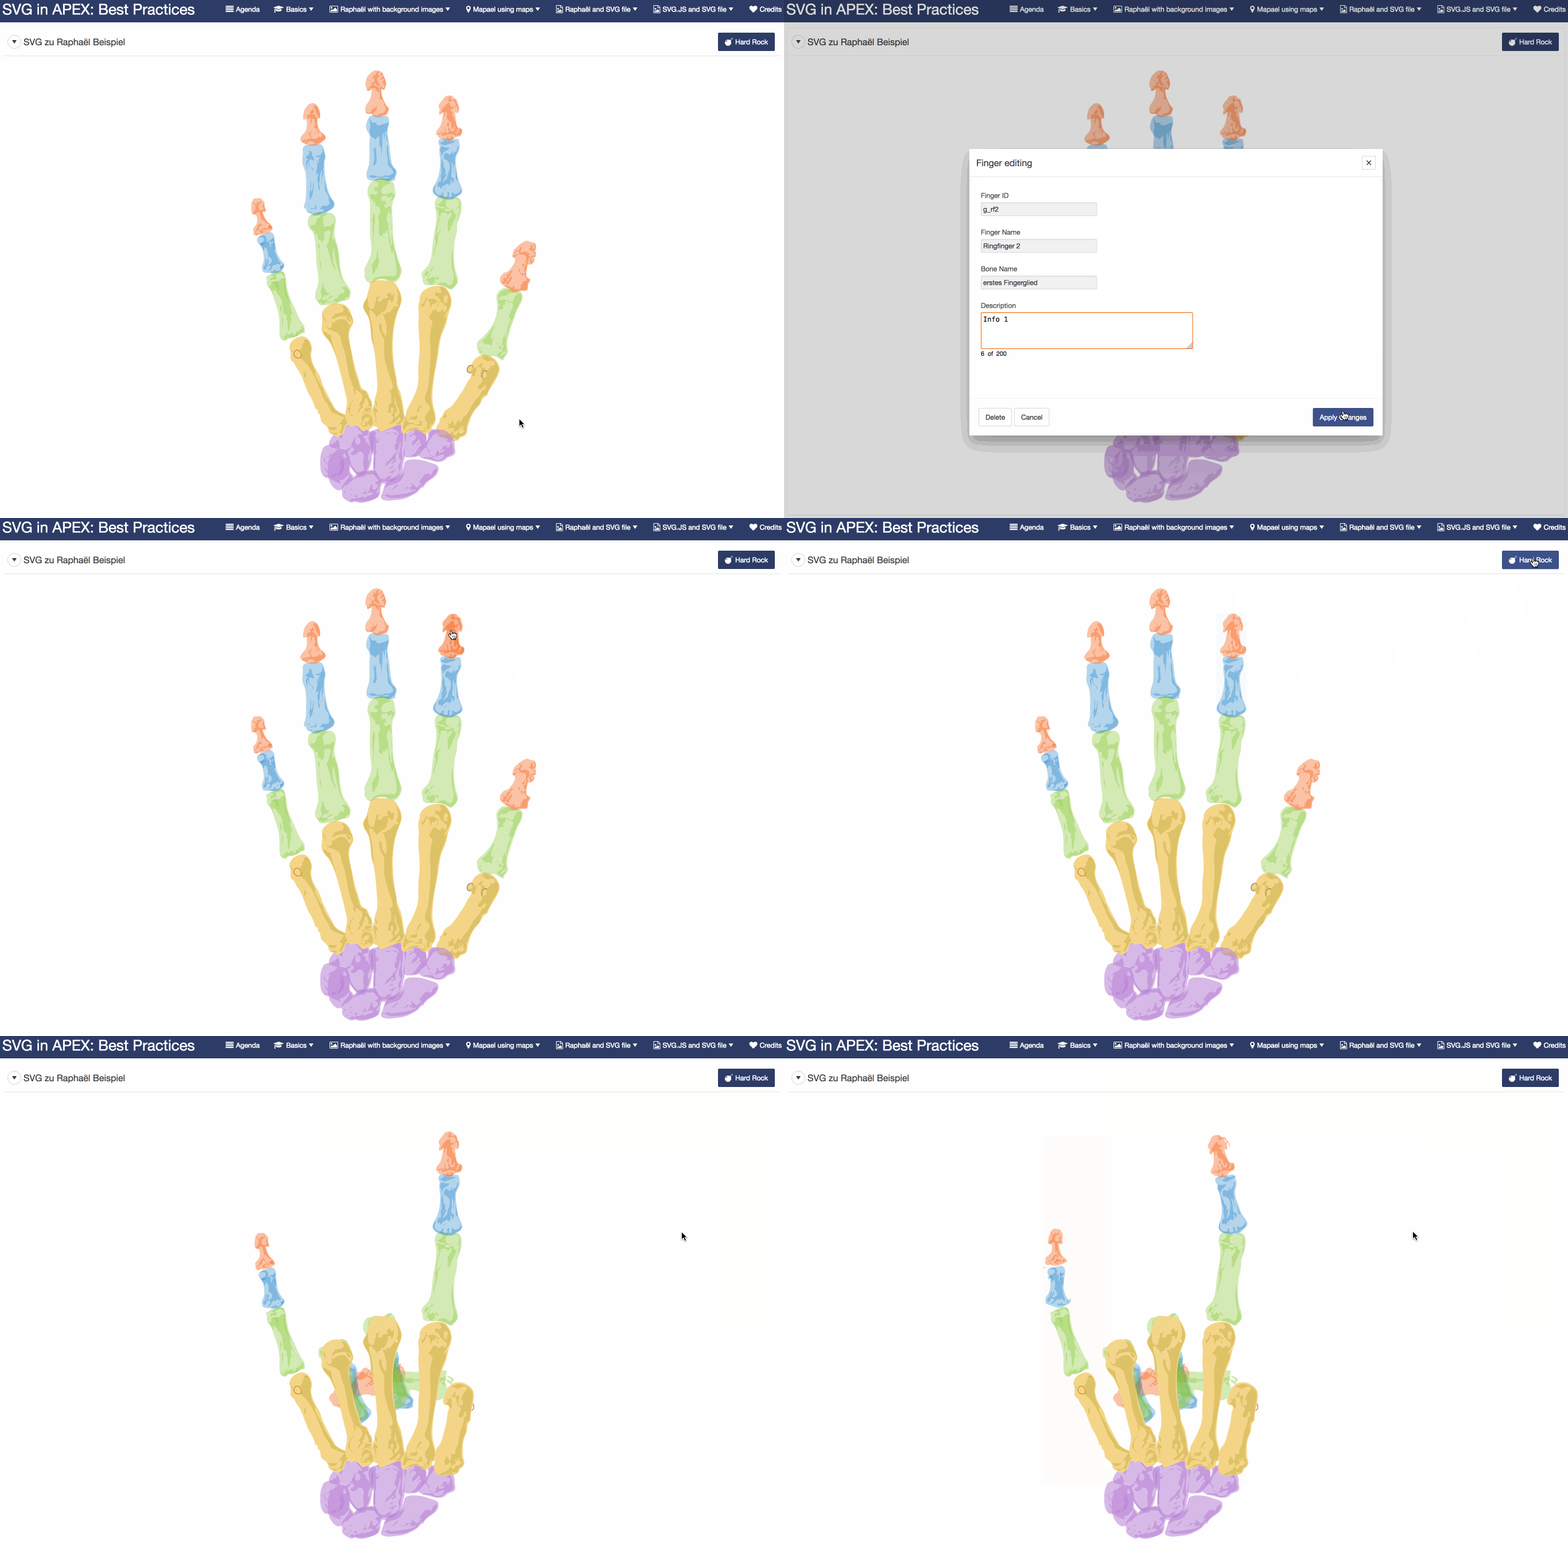
7. Raphaël - Transform, integrate and interact with external SVG file
The application includes several slides describing the way how to transform an SVG file towards Raphaël.


8. SVG.js - Integrate and interact with external SVG files

Using dynamic tooltips in your Interactive Report

Von Tobias Arnhold → 5.31.2016

Inside an Interactive Report (IR) I had a comment column. The comments in this column could become really large and the users wanted the comments to be automatically trimmed if more then 60 characters were displayed. If the user moved the mouse above a trimmed comment then a tooltip should be display including all comment text.

My first idea was to check for existing plugins which could do this job for me. So I searched on apex.world and found the plugin called "APEX Tooltip" developed by Daniel Hochleitner.

The plugin looked great from what I could see in the example application. When I tried it in my application I found out that all comments must be applied manually in the dynamic action.
Not exactly what I needed. :)

Luckily it was really easy to extend the plugin in a way that I could use it in my IR. To achieve what I need I had to update the javascript file: apextooltip.js
// APEX Tooltip functions
// Author: Daniel Hochleitner
// Updated by Tobias Arnhold
// Version: 1.1

// global namespace
var apexTooltip = {
  // parse string to boolean
  parseBoolean: function(pString) {
    var pBoolean;
    if (pString.toLowerCase() == 'true') {
      pBoolean = true;
    }
    if (pString.toLowerCase() == 'false') {
      pBoolean = false;
    }
    if (!(pString.toLowerCase() == 'true') && !(pString.toLowerCase() == 'false')) {
      pBoolean = undefined;
    }
    return pBoolean;
  },
  // function that gets called from plugin
  showTooltip: function() {
    // plugin attributes
    var daThis = this;
    var vElementsArray = daThis.affectedElements;
    var vTheme = daThis.action.attribute01;
    var vContent = daThis.action.attribute02;
    var vContentAsHTML = apexTooltip.parseBoolean(daThis.action.attribute03);
    var vAnimation = daThis.action.attribute04;
    var vPosition = daThis.action.attribute05;
    var vDelay = parseInt(daThis.action.attribute06);
    var vTrigger = daThis.action.attribute07;
    var vMinWidth = parseInt(daThis.action.attribute08);
    var vMaxWidth = parseInt(daThis.action.attribute09);
    var vLogging = apexTooltip.parseBoolean(daThis.action.attribute10);
    // Logging
    if (vLogging) {
      console.log('showTooltip: affectedElements:', vElementsArray);
      console.log('showTooltip: Attribute Theme:', vTheme);
      console.log('showTooltip: Attribute Content:', vContent);
      console.log('showTooltip: Attribute Content as HTML:', vContentAsHTML);
      console.log('showTooltip: Attribute Animation:', vAnimation);
      console.log('showTooltip: Attribute Position:', vPosition);
      console.log('showTooltip: Attribute Delay:', vDelay);
      console.log('showTooltip: Attribute Trigger:', vTrigger);
      console.log('showTooltip: Attribute minWidth:', vMinWidth);
      console.log('showTooltip: Attribute maxWidth:', vMaxWidth);
      console.log('showTooltip: Attribute Logging:', vLogging);
    }
    for (var i = 0; i < vElementsArray.length; i++) {
      var vaffectedElement = daThis.affectedElements.eq(i);
      // call tooltipster plugin
      $(vaffectedElement).tooltipster({
        theme: vTheme,
        content: $(vaffectedElement).find('.rep_complete_comment').html(),
        contentAsHTML: vContentAsHTML,
        animation: vAnimation,
        position: vPosition,
        delay: vDelay,
        touchDevices: false,
        trigger: vTrigger,
        minWidth: vMinWidth,
        maxWidth: vMaxWidth,
        debug: vLogging,
        functionBefore: function(origin, continueTooltip) {
          $(vaffectedElement).trigger('apextooltip-show');
          continueTooltip();
        },
        functionAfter: function(origin) {
          $(vaffectedElement).trigger('apextooltip-hide');
        }
      });
    }
  }
};
Of course I had to update my IR as well.
First I trimmed the comment column and added a new hidden comment column:
SELECT
-- ...
  CASE WHEN LENGTH(COMMENT_COL) > 60 THEN SUBSTR(COMMENT_COL,1,60)||'...' ELSE COMMENT_COL END AS COMMENT_COL,
  COMMENT_COL as COMPLETE_COMMENT_COL,
from my_table
Then I updated the column attributes:
COMMENT_COL as plain text
- Static ID: rep_comment
- HTML Expression:
#COMMENT_COL#<div class="rep_complete_comment">#COMPLETE_COMMENT_COL#</div>


COMPLETE_COMMENT_COL as hidden column


I also had to add a small css snippet in the page attributes > CSS > Inline to hide the complete comment:
.rep_complete_comment {
display: none;
}

And as a last step I had to implement the tooltip plugin after refreshing the IR:
I used an advanced jQuery selector to get only those comments affected which had more then 60 characters.
td[headers='rep_comment']:contains('...')


The result looked like this:


UILayout for Universal Theme

Von Tobias Arnhold → 1.24.2016
Some of you may know the plugin "UILayout for APEX" I developed in 2011. It is based on the jQuery plugin called "UI Layout"

I'm currently develop a new version running only inside the Universal Theme (UT).  This version is completely redesigned and focused only to work with the UT.


Actually it is quite cool because it supports some really handy features: